Some of the configuration, normally typed into ACE Admin standard type of tables, can be imported from data files. The numerous tables for administration vary in complexity and content, which calls for special handling for each window. However, there is a general import procedure.
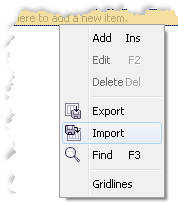
If there is a ![]() button or if the right click menu contains an Import menu choice you can import data from a standardised set of files.
button or if the right click menu contains an Import menu choice you can import data from a standardised set of files.
| Type | File extensions |
|---|---|
| Excel | .xls and .xlsx |
| Tab separated text | .txt |
| Comma separated values | .txt and .csv |
| Semicolon separated values | .skv |
Map file content with table layout
See The list of all access functions.
- In the table, right click and choose Import from the menu.
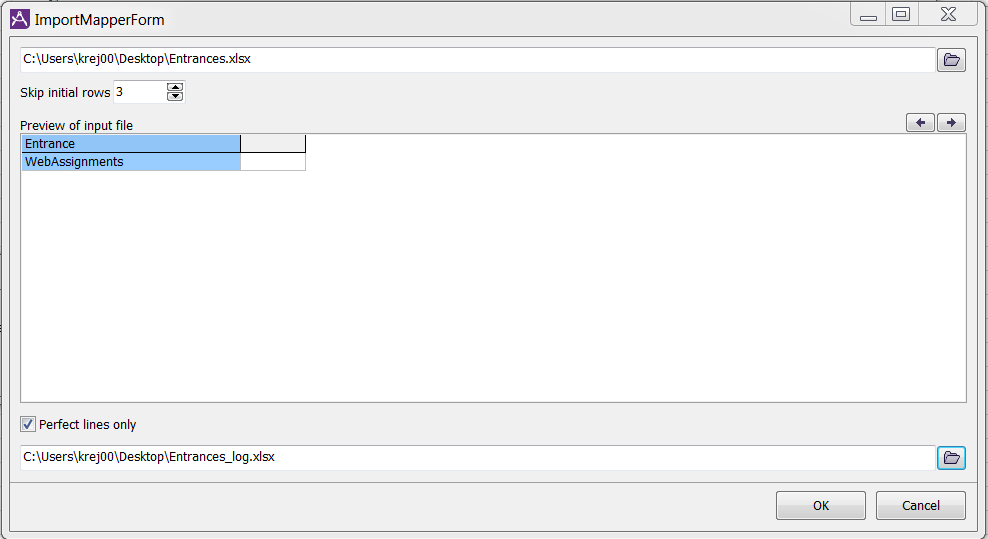
- In the file dialogue, select the file to import the data from. OK opens the Import mapping window.
- At the top it is possible to choose another file, by typing the path or using the file dialogue
 .
. - Set the following:
- Skip initial rows The number of lines in the file to be skipped, such as e.g. headlines.
- If you have chosen to import anything but Excel format you also have to specify the following:
- Delimiters
- Which special character separates the different columns? Alternately, how many characters are found in each column?
- Quote character
- Which character is to be used to surround texts containing the chosen delimiter, so it is not interpreted as a delimiter
- Under Preview of input file you see data after skipping the initial lines, divided into columns according to the previous settings of separator, column width and quotes above.
- With the arrow buttons to the right you can move a selected column to match the target table's column position.
- In some tables/windows you can tick the Perfect lines only to exclude any faulty lines from the import transaction. If you have specified a log file, described below, the skipped lines are seen in the log file.
- ACE can gather error information and collect the lines that could not be imported properly. If you don't want erroneous data to just be ignored, choose where you want to store the potential log file, and the file's name.
- Save the mapping and start the actual import with OK.

After the import, the content will be handled just like manually entered data. If e.g. a mandatory value is missing that cell will have a reddish surface, as described in Colours, icons and text attributesErroneous data will be written to the log file chosen in step 8 above.
Example of data possible to import
- Task types. See Basics about Task types.
- Entrances. See The Entrances, menu choices and task types window.
- Queues. See Description of Queues and waiting lists window.
- Skills. See Set users’ skills and groups.
- Users. See Basics about user accounts.
Tips when importing data
- Objects, such as e.g. queues, needs short names, i.e. database names. As these names must be unique within the system, the three first letters of the organisation area's name will automatically be added to your content in any Short name column.
- The Import to ACE Admin function checks your access rights etc. but also limits of the specific window and its columns. One example is in the User accounts window where content of columns have different requirements.
- To add data concerning personal telephony you require specific licences.
- For the UC-system column you need systems integrations.
- Columns can be hidden unless you have elevated access rights.
- To know how to structure the import content, and to avoid to much of manual correction after import, you can start by exporting the content from a current window.
In the Queues and waiting lists window for organisation area GolfDeskOnline you see the digit 2 in the Subareas column. Via the Subareas button you see sub area names International and Sweden.
Exporting the Queues and waiting lists window content you see that the Subareas column actually contains the text International,Sweden
Consequently - Importing a queue belonging to subarea(s), you do not add the number. The Subareas column data need to be composed the way you see it in the export file.