There are several ways to send an email. This is described in different sections below:
-
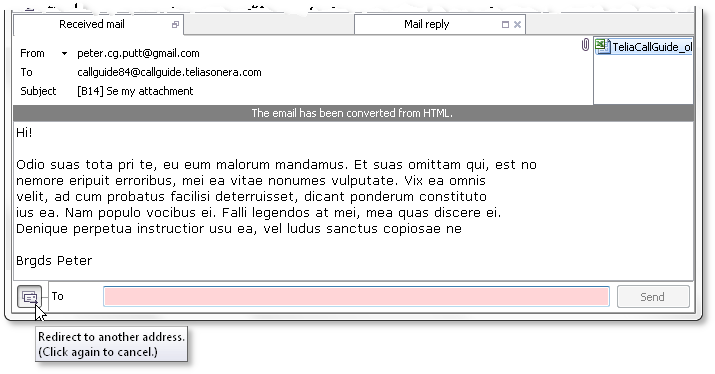
 Redirect to another address, without altering anything.
 -
 Forward as attachment
 -
 Forward
 -
 Edit as new email
 -
 Requeue, using the
  To queue button
Some of the methods for sending emails on are also available from the contact history archive, Interaction View.
Redirect emails to another address
If you have received a wrongly addressed email, or an email that for some reason is not to be processed within your group or department, you can redirect the email to the correct recipient without the original sender address being altered.
Using the ![]() button at the bottom left of the Received email window, a copy of the email is sent, directly from the server, to a new recipient. The original email and any attachments can consequently not be changed.
button at the bottom left of the Received email window, a copy of the email is sent, directly from the server, to a new recipient. The original email and any attachments can consequently not be changed.

When you click on this button, an address field is opened at the bottom of the Received email window. Enter the new recipient’s full email address, in the same way as described in section Answer an email in ACE Agent and click on the Send button. If the Send button is not available, you should check the recipient address.
The sent email copy has the same sender address and the same content, including any attachments, as the original email. The copy being sent does not mean that the contact is ended. For example, you can also send a reply to the sender that another address should be used the next time.
Forward email as attachment
With the ![]() button at the bottom left in the Received email window, you can forward a received email as an attachment in a new email. When you click on the button, a new, empty email is opened, with the received email as an attachment.
button at the bottom left in the Received email window, you can forward a received email as an attachment in a new email. When you click on the button, a new, empty email is opened, with the received email as an attachment.
As sender your agent name is displayed, together with the sender address you have chosen, such as EmmaC<golfdesk@ace.com>.
A email normally results in separate contacts with different agents. The exception is emails sent internally within ACE. If you forward the email to another person within the contact center, the queue time and priority are kept. Furthermore, the original email’s contact identity is included in the new contacts, making it possible to follow up the events for the first email via Historic Data Interface.
Forward
Using the ![]() button at the bottom left in the Received email window, you can forward emails, with or without your own text changes. This can e.g. be used when an email contains several different tasks, which agents with other skills can handle. Then you can, completely independent of each other, send your replies to the same, or different, recipients.
button at the bottom left in the Received email window, you can forward emails, with or without your own text changes. This can e.g. be used when an email contains several different tasks, which agents with other skills can handle. Then you can, completely independent of each other, send your replies to the same, or different, recipients.
When you forward an email it is automatically supplemented with sharing data, meaning that the email
- gets a sender addess displaying you agent name together with the sender address you have chosen, such as EmmaC<golfdesk@ace.com>
- begins with facts about who shared it and when it was shared, such as Forwarded by: EmmaC, 2015-01-28 14:32:44
- contains information about the original email, such as subject, original date, from where the email was sent and to which address, such as From: andy@office.com
Date: 2015-01-26 13:31:38
To: golfdesk86@ace.com
Subject: PayAndPlay
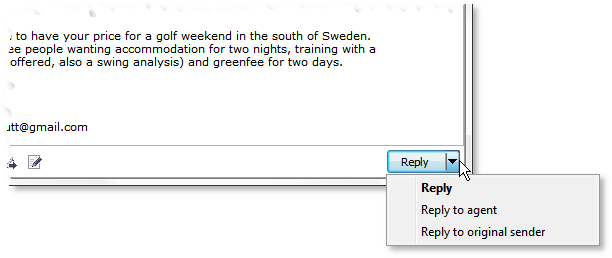
This type of forwarding can also be done internally, in the same way as forwarding an email as attachment. The agent opening the internally forwarded mail can also select whether replies shall be sent to the previous agent or to the original sender, by the Reply button.

Compose received email as a new email
With the ![]() button at the bottom left in Received email window, you can forward a received email as a completely new email. When you click on this button, the current email is opened as a new email, without old address data but with the existing text that you can use as a template, i.e. just complete and edit before it is sent.
button at the bottom left in Received email window, you can forward a received email as a completely new email. When you click on this button, the current email is opened as a new email, without old address data but with the existing text that you can use as a template, i.e. just complete and edit before it is sent.
You can also use a historical email as master if you have the access rights to use Interaction View. See About the Interaction View function.
With the ![]() button at the bottom left in Received email window, you can forward a received email as a completely new email. When you click on this button, the current email is opened as a new email, without old address data but with the existing text that you can use as a template, i.e. just complete and edit before it is sent. You can also use a historical email as master if you have the access rights to use Interaction View, which is described in a separate section.
button at the bottom left in Received email window, you can forward a received email as a completely new email. When you click on this button, the current email is opened as a new email, without old address data but with the existing text that you can use as a template, i.e. just complete and edit before it is sent. You can also use a historical email as master if you have the access rights to use Interaction View, which is described in a separate section.