If you have selected a report in the Report picker and clicked on the Schedule button, a window is opened under Filter settings where you give your report job to be a descriptive name and click on OK. If you select the Add button in the Scheduled Reports view, the same window, Create scheduled job is opened, but then you must first also pick a report from a drop-down menu before you can click on OK.
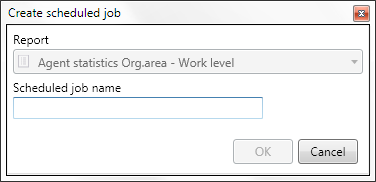
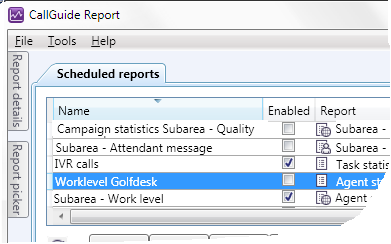
In Scheduled Reports you now see the job as a selected row in the list and the functions at the bottom part of the workspace are visible. You can, depending on your access rights also make additions to Filter settings.
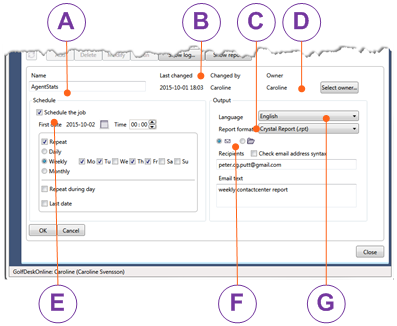
Rules for changing owner of report job
You cannot remove a user account from ACE Admin as long as this person has a scheduled job. Before the person quits his job, however, he can, with the Own statistics reports access right, transfer his report jobs to another statistics user belonging to the same organization area(s).
A change of owner cannot be carried out if the report job uses a personal filter or a personal report. To avoid problems when people are leaving, the following is recommended:
- Only schedule standard reports or global custom reports.
- Use global named filters and not personal for scheduling.
To change the owner of one of your report jobs, proceed like this:
- Select the relevant job in the list of scheduled reports.
- When you have selected the Change button, the Select owner button becomes available.
- Select owner opens a pane with a list of the users with affiliation to the organization area the report is filtered by.
- There you select the user to take over your report job and click on OK.
- Also click on OK in the bottom left corner of the Scheduled reports window to save the change.
Run the job once or repeat the run
If the report is going to be run automatically, you first select Schedule the job to see which parameters you can select.
Pick a start date from the calendar beside First date and a time beside Time. The job will then start on the specified date and time and will never run again. You tick Repeat if you want the job to be run more than once. Then you choose when it shall happen.
- Daily
- The job is repeated every day.
- Weekly
- Tick the weekdays you the job to run each week. What you have entered as Time after First date above specifies the time the job shall run for the days it is scheduled for.
- Monthly
- In the field opened when you tick the radio button, you enter the days you want the job to run. Day is set by the figure for the day in the month, e.g. 1 for the first day. If the job shall run for separate days during the month you can enter several days as figures separated by commas, e.g. 1,3, 5 and in intervals as figures with hyphens between them, e.g. 7-18.
- Repeat during the day every x minute until x o'clock
- The job can run several times a day until a specific time during the selected days, weeks, or months. Tick the checkbox and choose the number of minutes (presented in half-hour intervals) and an optional stop time using arrows in each respective field.
- Last date
- If you select a last date in the calendar by Last date, the job will run for a limited time.
If the checkbox is left unticked, the job will continue to run until the job schedule is modified, the job is deleted or inactivated. You inactivate a report job in Scheduled reports in the following way:
- Select the report job in the list.
- Remove the tick in the Enabled checkbox.
Output data – report format
Under Out data you pick the file format best suited for what the generated report will be used for. If you want to use other file formats than Crystal Reports we recommend that you first make sure that the most interesting information is presented at the top level of the report. The formats you can choose between are:
- Adobe Portable Document Format (.pdf)
- Crystal Report (.rpt)
- Extensible Markup Language (.xml)
- Hyper Text Markup Language (.html)
- Microsoft Excel (.xls)
- Microsoft Excel - data only (.xls)
- Microsoft Excel Workbook - data only (.xlsx)
- Microsoft Word (.doc)
- Rich Text Format (.rtf)
- Tab separated values (.tab)
Output data – attach report to email
Select ![]() if the report will be sent via email.
if the report will be sent via email.
Under Recipients you enter one or more recipient addresses. If the report will be sent to more than one e-mail address, you enter a semicolon ; between the addresses.
Having ticked the Check email address syntax, the address field will be yellow and the OK button unfit for use until you have entered at least one correct email address. If, for some reason, an address is not approved, you work around this check by unticking the checkbox.
Under Email text you can enter free text that then will be included in the email - where the report comes along as an attachment.
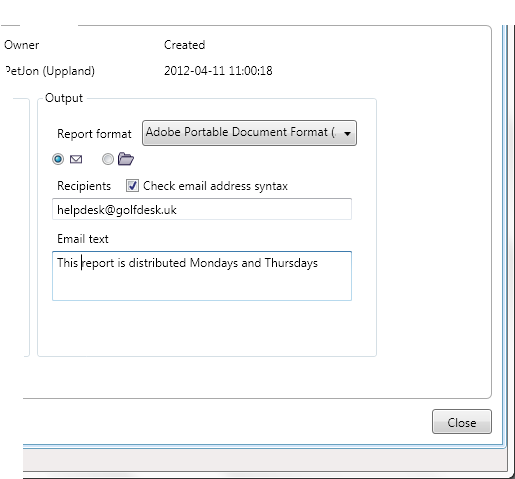
If you do not enter any text, ACE will generate a standard text based on the content of the attached report. The standard text i.a. contains information about user, report type, time unit, and the report's name.
Output data – store report as file
Select ![]() if the report will be stored as a file on a file server. Only applicable to enterprise solutions.
if the report will be stored as a file on a file server. Only applicable to enterprise solutions.
Set an optional File name. Suffix is automatically added depending on the file format you have selected in the drop-down menu above. If you do not enter a name, the report will automatically be given a name generated from statistics type, time unit, and name, such as Agent statistics Day Subarea - Status.rpt.
When a report is scheduled to file, the files will be stored in folder under the rootdirectory\username\xxx. What you must choose is one of two folder concepts:
Select Date folder if you want to avoid that reports for a job supersede each other on the file server, i.e. if you do not want reports from the previous day to be overwritten. Each day the job runs, the report is saved in a new folder on the file server. The names of the folders will be the date for the run, such as Report\Caroline\20120728.
If you select Job folder you must specify the name of the folder where you want the reports to be saved. The structure is then constant, meaning that every day the job runs, the report will be saved in the same folder. This can then be used for web publishing; Reports\Caroline\FeedIntranet.
When you are done with all your choices, you click on OK in the bottom left corner. The job is thereby scheduled and visible in the Scheduled reports window.
Tips for best performance when scheduling reports
ACE Report Server allows reports that have been scheduled at the same time to be generated at the same time as well. For performance reasons you should, however, avoid scheduling reports in parallel.
Reports can be scheduled to be generated several times during a day. At recurrent generation of one single report, the first generation must, however, be completely concluded before the time for the next generation.
If the generation of a report continues for a long time, this can be so because the report is fetching large amounts of statistics or that some error has occurred. With a system parameter you can set a maximum time for how long the generation of a report is allowed to continue until the operation is automatically stopped. You find this system parameter in ACE Admin, the Settings | system parameters menu choice, the Statistics tab.
Delete report job
All users can delete their own report jobs. With the Own statistics reports access function you can delete another user’s report job, provided that you also are affiliated to the organization area your colleague is affiliated to.
To delete a scheduled job you select the job in the list in the Scheduled reports view and click on the Delete button. However, you can still see the scheduled report's earlier runs in the Scheduled report log window.
Start report job via command line in Windows – Ctrl L
If you want to be able to start a specific report job manually, without using a schedule, you can enter a command line in the command prompt or in a Windows shortcut.
To find out which syntax to use and how the specific report job is called, you select this job in ACE Report, in the Scheduled reports window, pressing Crl L on your keyboard.
The syntax is as the following example, where the report job’s unique integer identity is filled in automatically when you proceed as described above:
Report -Job <number> -L <username> -P <password> -Lang <swedish/english> -Folder <path> [-C <connection>] [-Internal]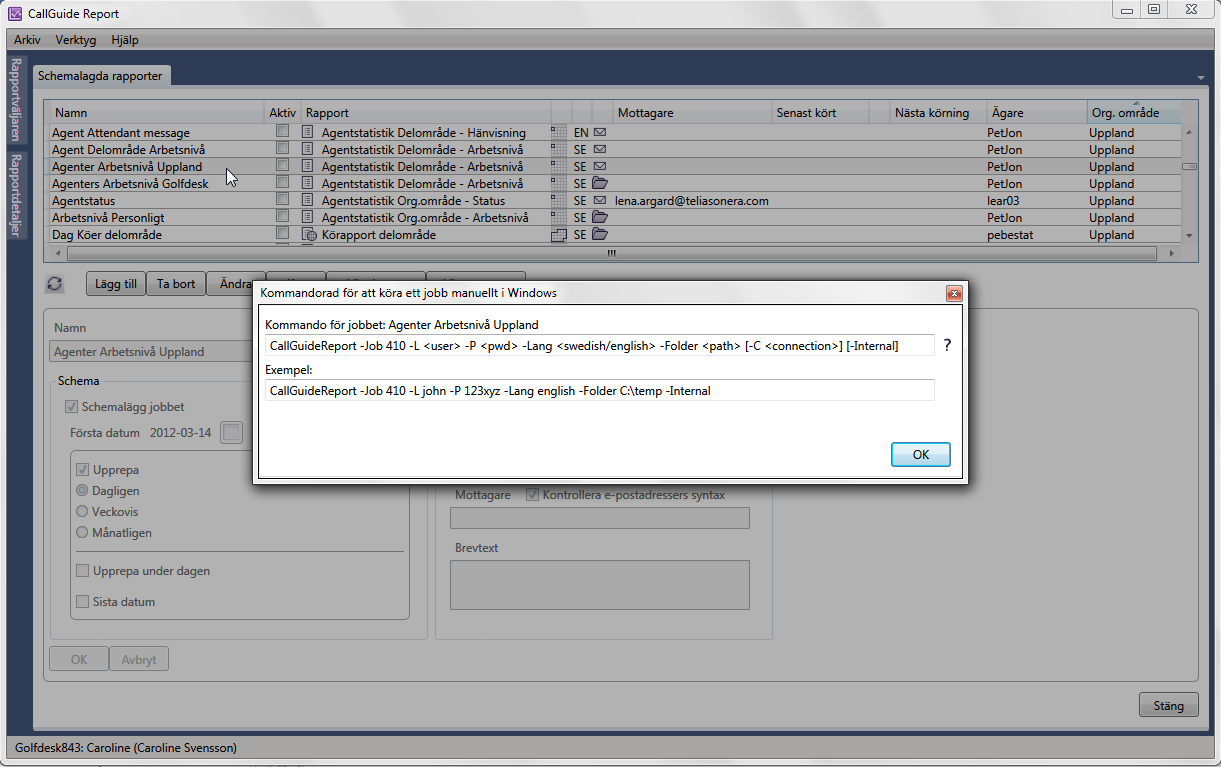
When the user John creates his shortcut he enters a command line, looking like this:
Report -Job 410 -L john -P 123xyz -Lang english -Folder C:\temp –Internal