When you in ACE Agent select a Work level ![]() where chat is included, a separate chat window is opened.
where chat is included, a separate chat window is opened.
Accept or F10 opens the incoming chat, unless you in a client setting have specified that chat shall be automatically accepted.
If you are to handle more than one chat at a time, see Work with multiple chats in ACE Agent.
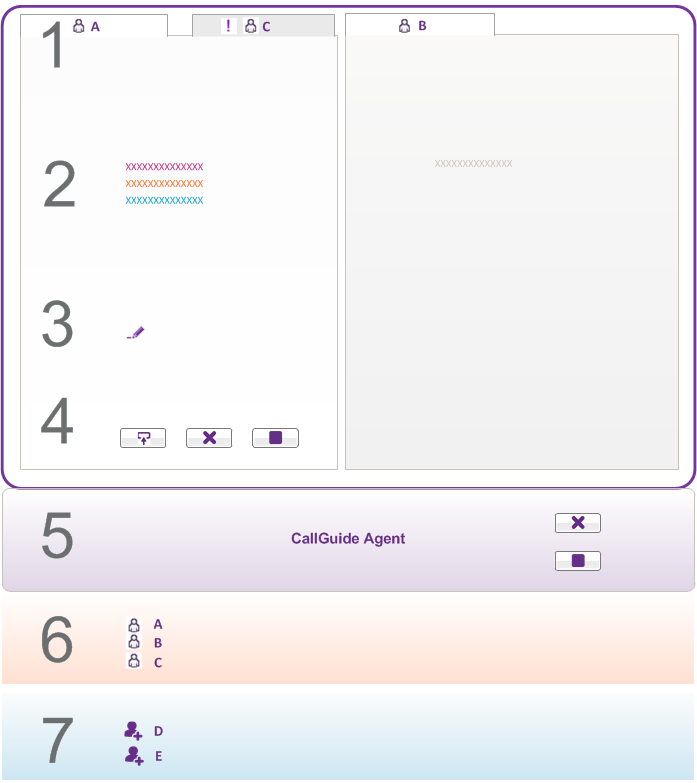
In this sketch the chat window is placed above ACE Agent main window, with two chat areas according to choice in client setting, and three accepted chats.

- Each chat is one tab. Here two are visible and a third behind. Parked chats are somewhat darker.
 indicates info in a hidden chat.
 - In chat history you see automatic texts and the parties’ entries in different colours.
- Enter your text in the entry field. A pen is seen when the other party is writing.
- Handle active chat with different buttons.
- Send or Enter sends your text.
- Drop or F3 ends the chatting.
Status turns to Wrap-up.
- Terminate ends the contact completely.
- Same buttons as in Agent main window.
- In the Contacts in progress area you see the same contacts as in the chat window’s tabs.
- In the support functions area you can have a waiting list. Double-click to open a contact.