Operator information can e.g. be facts about when a person can be reached or who to contact if the person cannot be reached. The information is fetched both from ACE and from the connected UC systems supporting this.
- If you have the access right, and if the source allows it, you can see, change, and add operator information for a person.
- The Operator information tab can be used when Unifinder is maximized.
- Whenever there is operator information available for the selected person, an icon in the status bar will indicate this in order to make the operator aware, since the tab may be hidden or collapsed.
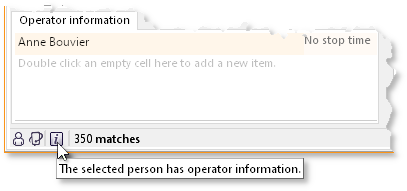 _
_To make things easier for screen readers and other accessibility tools this icon is visible regardless of the visibility of the operator tab, given there is any operator information to see.
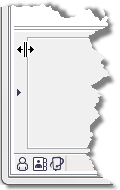
- The tab is a collapsible area at the bottom left of the Person tab. The tab can be opened and closed in different ways:
- Open by double-clicking on the small triangle
- Open and close with Ctrl Alt I on your keyboard or by pulling the dividing bar

In the Operator information tab content data such as e.g. URLs can be clicked to action, via the context menu.
If there is an email address you can start writing your mail directly from the operator information tab:
- Mark the email address row.
- Right click to see the menu.
- Choose the wanted email address in the Email sub menu.
- The New mail support function will appear, with the selected email address pre-filled.
If your connected UC system is Marvin, you also see the Redirect extension tab in the same area.
See and enter operator information
One person can have several operator messages. Messages are sorted by when the were last changed. If a message cannot be changed or removed, the row is grey.
This is how you add operator information:
- Make sure the intended person is selected in the search result
- On the Operator information tab, double-click on the first empty row.
- Enter a text in the text column.
The message text is wrapped when necessary. You can wrap text yourself using Ctrl Enter. - Set any time for when the message shall expire, by clicking in the next field to the right of your text. Select the checkbox.
- Unless it is selected, the message will not disappear automatically. Operator information added via ACE Agent is cleared when the specified date passes over to the next, i.e. at midnight.
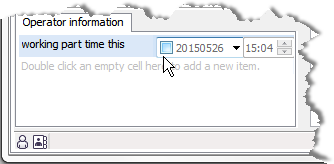
- Pick any other date in the calender opened with the down triangle. When you click on the arrow the checkbox is automatically selected.
- Time is automatically set to the current time when you select a date. Change it by entering figures in each respective column for hours, minutes and seconds.
- Unless it is selected, the message will not disappear automatically. Operator information added via ACE Agent is cleared when the specified date passes over to the next, i.e. at midnight.
- The change is saved immediately when you leave the row, i.e. when you click outside the text field or press Enter or Tab. Esc interrupts the change in progress.
- Delete removes the selected text row.
To remove information, you select the intended row and use the Delete key on you keyboard. Or you select Delete in the context menu opened with a click on your right-hand mouse button.
You can undo the removal or a row as long as you have not left the row. Then select Undo in the context menu or press the Ctrl Z keys.