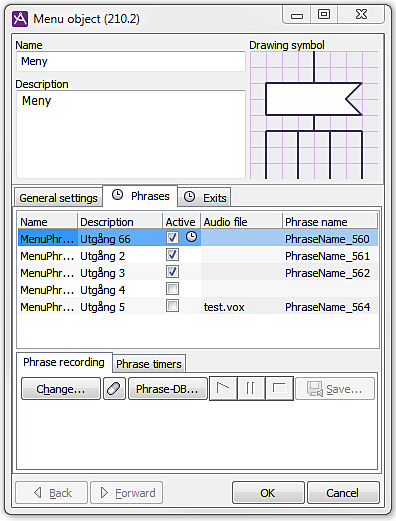
You can use ACE Admin to timed phrases in phrase objects, phrases in menu objects, as well as schedule exits in menu objects. The timers are configured in the same way for both phrases and exits.

Timers are seen as rows in a list in the bottom part of each window, or tab. Each row either activates or deactivates, the phrase or exit. An activating row is shown with a  in the Active column, to the left in each window.
Set times for timers
To configure timers you start by clicking on the empty row at the bottom of the date and time fields. What will happen if the field is not filled in and how timers are specified is seen in the following table.
| Time exemple | If field is left empty | If one or more values are entered |
|---|---|---|
| Year, e.g. 2019 | The event occurs every year, indefinitely. | If you enter a year, from this year and five years on, the event will only occur for the specified years. |
| Month, e.g. 1 = January | The event occurs repetitively each month. | The event will occur only for the specified months. |
| Day, e.g. 1 = the first day number in month | If Day is empty, the event will be possible regardless of day. | The event will only occur for the specified day.
If the Weekday field is not empty, the event will also be possible according to the specified weekdays. |
| Weekday, e.g. 1 = Monday | If Weekday is empty, the event will be possible regardless of weekday. | The event will occur on the specified weekday/s.
If the Day field is not empty, the event will also be possible according to the specified days. |
| Hour, e.g. 00 = midnight | You must always enter the hour. | The event occurs only at the time specified in hours and minutes. |
| Minute, e.g. 10 = ten past |
Values can be entered as an interval, e.g. 13-27, or as a comma separated list, e.g. 1,5,10 or 2007-2009,2011.
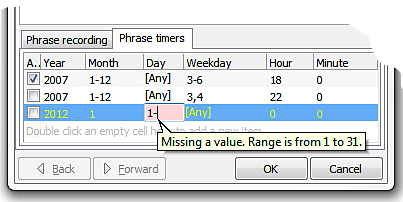
You cannot leave a field until it is correctly filled in. An adjusted entry help is shown when the field is not filled in correctly, giving a hint about what is wrong.

If you want to restore the field to as it was before you started entering anything, you press the Esc key on your keyboard.
Use calendar to pick a date
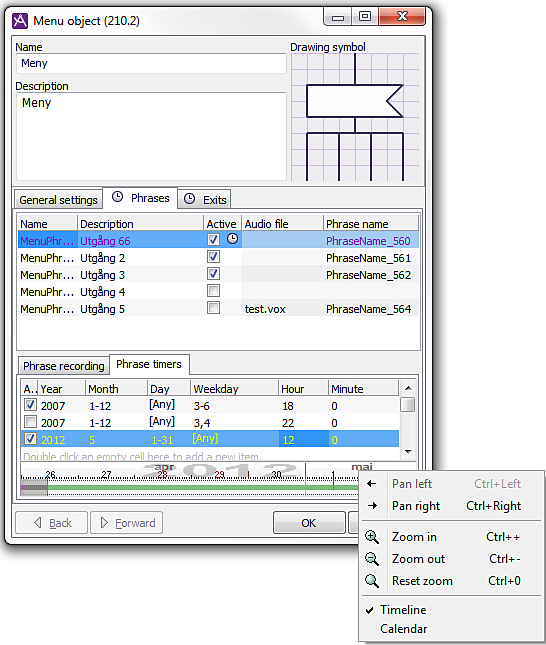
To easier find and fill in the correct date and time you have a calendar at your disposal. You open it through the menu activated by a right click. In the calendar you pick a specific date or an interval with dates, and hour and whether you want to enable or disable.
When you have picked your date, you press the Enter key and click somewhere outside the calendar. If you press Esc on your keyboard, the calendar is closed, and the selected timer row is not changed.
When the calendar is closed, the selected row is filled in with the selected time. The new row is not yet saved, seen by its green text colour. A changed existing row that is not yet saved is seen in blue text colour.
Graphic presentation of time events
Below the timer row, there is a tool to see the time events (the enablings and disablings) graphically, along a timeline. You open the timeline by selecting Timeline in the menu activated by a right click.
This view illustrates the summed effect of all the timers listed in the table, each row in the table acting as either an activating (On
) or deactivating (Off
) event. When an On
event is triggered, it activates the phrase or exit. When an Off
event is triggered, it deactivates the phrase or exit. Activating an already active phrase or exit naturally has no effect, and neither will deactivating an already inactive phrase or exit.
At the top you see a date ruler with marks for days (or week number if the scale does not fit days), month and year. In the field below the timers you see times and events in different colours, according to the following list:
- Saturdays and Sundays are seen in red text on a reddish background.
- Past time is seen with a dark grey background colour. Present time is marked by a highlight coloured line at the end of this field.
- An enabling is seen by a dark green line towards the top.
- A disabling is seen by a dark red line towards the bottom.
- The
active
time – the time between the enabling and disabling events – is drawn as a light green horizontal bar. - Should the normally light green bar be light grey, this means that enabling and disabling are in conflict, i.e. they occur at exactly the same time. The time from this conflict to the next well defined event (enabling or disabling), is seen in light grey to signal that
this could be enabled, but it is not possible to tell
.

You can adjust the scale yourself and/or the position of the time view along the timeline using you mouse pointer and keyboard. The timeline is divided into three virtual fields – two zoom fields and between them a pan field. In the middle of the timeline the mouse pointer is turned into a left-right arrow, at the sides the mouse pointer is seen as a magnifying glass.
A popup menu with the various key combinations that can be used is seen if you right click on the date ruler at the top. If you are using a wheel-mouse you also have the option of doing this
- To change the time scale: Place the pointer anywhere in the calendar area, hold down the Ctrl key on your keyboard and move the scroll wheel of the mouse.
- To move focus along the timeline: Place the pointer on the time ruler, hold the Ctrl key on your keyboard, while you right-drag sideways.


panleft or right.