An entry holds information of one person or one company in your address book. E.g. First name and Surname together with phone numbers etc.
An entry in an address book is created by first selecting the address book or folder in the hierarchy where the entry is to be added. Then you can choose between
- clicking on the
 New entry... button,
 - moving your focus to the list of entries and then pressing Insert on your keyboard, and
- right clicking in the entry list and select New entry in the context menu.
All three variants above open a new window, New entry, where you can enter the desired information about a person or a company.
It is also possible to create a new record by duplicating an existing record.
New record can be created in an organisation area specific address book if you have Modify address book for organisation area or Own address book for organisation area in your access profile.
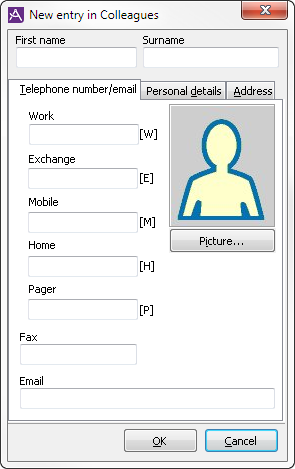
This New entry window, just like Edit entry and Duplicate entry, has three tabs where you can enter information:
- Telephone number/Email
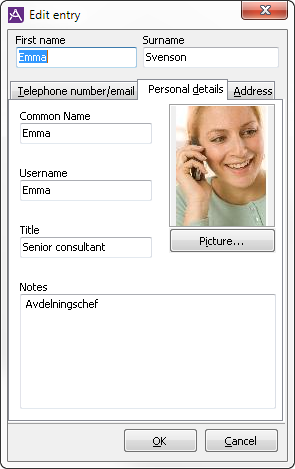
- Personal details
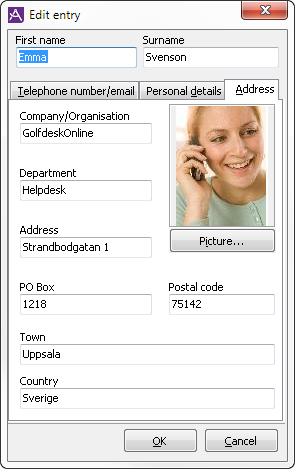
- Address
The fields or buttons that may need an explanation are described in the following section.
First name, surname, display name and username
A new entry must always have a value for First name and Surname. If the entry is given a first name and surname identical to any existing entry in the same address book, there is a potential risk of confusion. To prevent this, a warning dialogue box appears. You must then ensure that the new entry is given a Display name that is different to the Display name for existing entries with the same first names and surnames. Display name can be specified under the Personal details tab.
The Username field on the Personal details tab can be used for any username, for example usernames in ACE or in some other system.
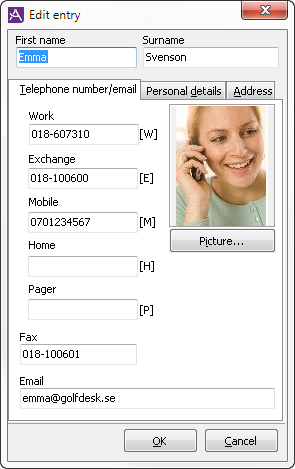
More than one telephone number
In ACE Agent the agent can copy the various telephone numbers to call them and to save them in a list of favourite numbers. If there are several telephone numbers to one person, the agent can see the type of number by letters. The numbers that can be entered under the Telephone number/email tab are each represented by a letter:
| Letter | Meaning | Represents |
|---|---|---|
| [ W ] | Work | The telephone number to where the person works. |
| [ E ] | Exchange | The company exchange number. |
| [ M ] | Mobile | The number to the person’s mobile telephone. |
| [ H ] | Home | The number to the person’s home telephone. |
| [ P ] | Pager | The number to the person’s pager. |
When an agent makes a call, ACE analyses and automatically corrects the telephone number, regardless of whether it is manually entered, fetched from an address book, or from a connected system, It may e.g. be that the specified telephone number only functions when it is called from a specific exchange location, but will have to be corrected when called from another exchange location, e.g. by adding a zero or removing a country prefix. ACE can also avoid making an external call in case the selected number is to an extension under the same exchange as the one your telephone is located under.
To make all calls being dialled in the best way and that the same address book is used regardless of the extension locations the agents are located at, you should enter all telephone number as complete as possible, preferably with a so-called Canonical format, to be able to dial the number abroad, such as +4618182900, or with so-called national format with area code and prefix, such as 018182900.
Add a picture
Should you want to add a picture of a person you can click on the Picture... button in the New entry window and point out a *.jpg or *.jpeg file on your hard drive or in your network. For a picture to be accepted by ACE it cannot be larger than 8 kB and must have the file format JPEG.
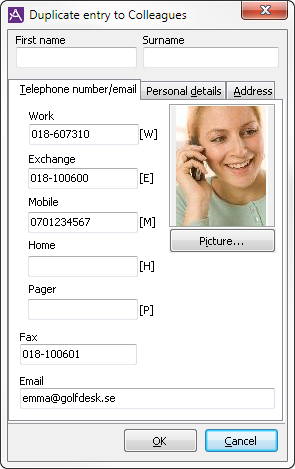
Duplicate entry
A new entry can be created by duplicating an existing entry.
If you want to add a new entry and want to use the contents of an existing entry you can choose duplicate. To duplicate an entry you select the name in the list in the right part of the Administrate address book window and then click on the  Duplicate... button. The user sees a window where the duplicated details can be edited. All data, except First name, Surname, and Display name from the Personal details tab, come along to the new copy. You can enter new information in all fields. It is important that you are aware of the fact that Display Name is unique for each entry in the address book.
The new entry is placed in the same folder as the duplicated entry.
Edit entry
To change details in an entry, select the name in the list in the right part of the window and double click on the selected entry or you click on the  Edit entry... button. This leads to the Edit entry window, where all the existing information about the entry is shown, and where you can add information under the three Telephone number/email, Personal details and Address tabs.