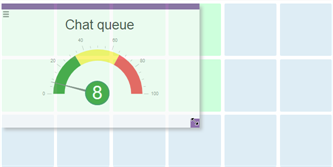
For a short introduction see Basics about ACE Monitor. Also see Best practice for ACE Monitor.
To enable ACE Monitor, all related settings must be complete in ACE Admin, the System parameters for interfaces window.
To set up and use ACE Monitor you must have the access rights described in sections Using Pulse, Monitor and Report.
- Open your web browser and enter the URL to your ACE Edge site.
- To log in, select preferred Language and enter your ACE Username and Password.
- Open the main menu
 on the top left. This is also where you
  Log out.


Create a page / wallboard
 In the menu, click Create page.
- Give the page a Name.
- Choose which Organisation area to show data from.
- Select an icon, to easier separate it from other pages.
- Save with OK to add it to the list to the left.
- To make changes later, mark the page name and select Edit page or Delete page from the main menu.
- Set your page in full screen mode, click
 in the menu or at the bottom right of the page. To minimize again, press Esc or click
  at the bottom right of the page.
Create a card on selected open page
 In the menu, click Create card.
- Choose Data origin, such as e.g.
 Subarea,
  Task type or
  Other and pick a Card type, determining what is to be displayed and how. See Card types in ACE Monitor.
 - After saving with OK any changes are made via the card's menu.
- Move and resize the card with you pointing device.


Settings and help
 In the menu, click Settings.
- Set the Refresh rate for all your views. Latest data values can be gathered every 10th second up to once per minute.
- Choose the Colour theme best suited to your display environment. The background of the page and the cards will be light or dark.
- Change your ACE Password.
 In the menu, click Help to open the online help.
If you lack any options described above:
- Review your ACE access rights. See Using Pulse, Monitor and Report
- Use another web browser.