The window that the Routing of contacts... menu choice leads to, has four tabs.

Each of these tabs displays the routing table that is applicable for the type of contact in question.
At the top of the window there is a box for selecting organisation area. Each organisation area has its own rules for routing. An incoming contact is considered to belong to an organisation area that is determined by its contact data ‘entrance’. The contact is normally processed according to this organisation area’s routing rules. Using escalation points, however, contacts can be referred to other organisation areas. See the section under the Escalation points... menu.
The IVR calls tab
The routing table for IVR calls, i.e. incoming telephone calls may appear as in the screen shot below.
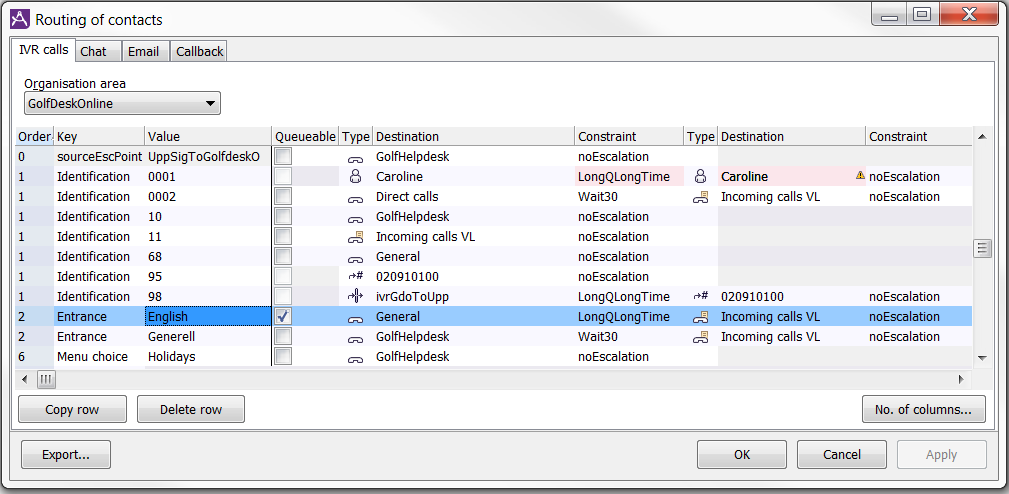
Each row in the table corresponds to a routing rule. Each rule has an applicability criterion and one or more routing destinations. The rules are those that apply for the organisation area specified in the drop-down list at the top.
In the leftmost column you see a number corresponding to the order in which different combinations of contact data keys shall be used when ACE is searching for an appropriate routing row for a specific contact. The search order is configured per media direction and organisation area in the Routing search order window.
The applicability criterion is found in the columns Key and Value. Key specifies the current contact data key. Value in the column to the right of the each key specifies the value this key shall have in order for the criterion to be satisfied.
A criterion can contain an arbitrary number of key-value combinations. The table is given as many key-value columns as are required for the most comprehensive criterion to be expressed. Available keys are configured in the window Contact data per contact type.
The Type, Destination and Constraint columns are all related to routing destinations:
- Type shows what type a particular destination is. For example, Queue or waiting list. This is selected with a drop-down list but is displayed with a symbol. Available alternatives and their symbols can be seen if you click any row in the column Type.
- Destination shows the intended specific destination. If the type is Queue or waiting list, for example, the destination shall be a name of a specific queue/waiting list. In most cases, destination is selected in a drop-down list. However, an external telephone number is specified in a text field.
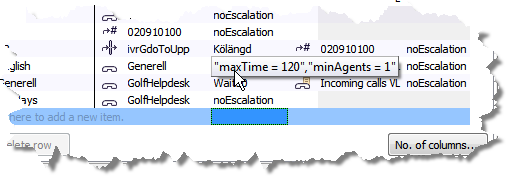
- Constraint is a condition for escalation to the next destination. Selected from a drop-down menu. A contact first has to wait at the destination that is first (farthest to the left of all the destinations) in the rule. If the contact is not served, the first constraint determines whether and when the contact should be escalated to the next destination. This destination, and subsequent destinations, can also have escalation constraints for possible moving to another destination. Moving the cursor over an escalation constraint reveals the parameters and values. If an escalation constraint does not have parameters, only the name is shown.
The Place contacts in queue function means placing a contact in queue to a specific row in the routing table. To enable this, select a specific queue and tick the column Queueable. Now an e.g. incoming an call replaced in this queue is to be controlled by the routing rules.
The rows that are not part of the routing order will end up at the bottom of the routing formula, below the rows sorted according to configured search order, and will be shown according to when they where entered. You will also see an alert, when the routing formula is closed, that there are rows without configured search order, meaning that the rows that are not part of the search order in Routing search order will not be used.
The Apply button saves changes made in the table. The OK button saves the changes as well but also closes the window. Changes take effect when the window is closed, even if they have been saved earlier.
Only one user at the time should change the routing for an organisation area.
The Export... button is utilised to export the information to a file that can be opened with Excel, for example.
Add new row to routing table
The following has to be taken into account when creating and modifying a row:
- Each row must have at least one key-value pair.
- Each row must have at least one type-destination pair.
- Each escalation constraint must be followed by a type-destination pair. The noEscalation choice, however, does not have to be followed by any type-destination pair.
To add a new row, you click in the empty row at the end of the table. Fill in the values in all relevant columns, from left to right.
A row does not need as many key-value pairs or type-destination pairs as there are columns in the table. Leave unwanted columns empty.
Modifications are made directly in the table by selecting a new alternative from a drop-down list or entering a new text in the relevant column.
Copy row in routing table
To create a new row that has largely the same column content as an existing rule, select the existing rule, click on the Copy row button. The copy can then be changed.
Add columns to the routing table
An existing table may need to grow in order to make room for more key-value pairs or type-destination pairs. The number of existing columns for such information may be insufficient for one or more rules.
To increase the size of a table, click on the No. of columns... button, increase either Number of contact data, Number of destinations, or both, in the appearing dialogue, and click on the OK button.
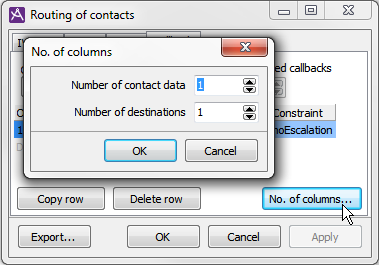
You cannot use this dialogue box to reduce the number of columns. Empty columns are deleted automatically if you leave the Routing of contacts window and then reopen it.
Remove row or columns from routing table
To delete a row, select the row and click on the Delete row button.
To reduce the number of key-value pairs in a row’s applicability criterion, or the number of type-destination pairs in a row, select the -NONE- alternative for the pair to be removed. If an earlier entered escalation constraint becomes invalid since there is not destination to escalate to, you select noEscalation as the new constraint.
The Email tab
The routing table for Email, i.e. incoming emails, works in the same way as the tab for IVR calls, decribed above.
Contact data key routing for emails work basically in the same way as for other contact data keys. The exception is five contact data keys. The names are configurable and can be varied.
- EmailHdrFrom
- EmailHdrTo
- EmailHdrReplyTo
- EmailHdrSubject
- EmailCategories
In the Value column it does not matter if you use upper or lower case letters for the contact data keys described above.
Emails are categorised by key word based methods and by pattern matching. Using pattern matching, which is always performed, information in emails is searched according to a specified pattern, a specific syntax. If the key word based method is activated as well, emails are searched according to the key words defined in a named group; a category.
The four keys EmailHdrFrom, EmailHdrTo, EmailHdrReplyTo, and EmailHdrSubject can be used for routing even if the key based method is activated. Here it is only necessary that what has been stated in the Routing of contacts window, the Email tab, the Value column is a sub string of what you can read in the head of an email.
| Contact data key | Value |
|---|---|
| EmailHdrFrom |
Billin the value column matches ”bill.booker@work.com” in input data. |
| EmailHdrTo |
invoice@work.comin the value column matches invoice questions <invoice@work.com>in input data. |
| EmailHdrReplyTo |
Bill@work.comin the value column matches BILL@work.comH>in input data. |
| EmailHdrSubject |
orderin the value column matches Re: Thank you for your orderin input data. |
To route email by category, the EmailCategories contact data key is used. This calls for an exact match of the input data – what you can read from the emails – and the categories configured in ACE Admin. In the routing window above you may state several categories, separated by semi colons. Their relative position is of no importance.
”Invoice;Internet” in ACE Admin matches input data ”internet;invoice”.
The Callback tab
The routing table for callback works in the same way as the tab for IVR calls, except that in this tab it is possible to state the maximum number of call records allowed to be queued for the specified organisation area. The purpose of this function is to limit the number of callback records that can be entered, to avoid entering more records than the agents have the time to call.
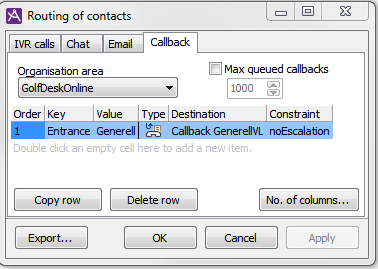
Tick the Max queued callbacks box and select the number of records allowed to be queued for the organisation area. If the number of callback records put up for immediate calling exceeds the maximum value, the IVR, if programmed this way, will not offer callback. You can also specify a similar limitation per named callback queue in the Queues and waiting lists window.
The Chat tab
The routing table for Chat works just like the IVR calls tab, except that a chat cannot be routed External  . Automatic transfer back to queue in case the agent does not answer in time cannot be made either. These chats will continue calling until the customer gets tired and ends the chat request. If ACE Agent is shut down when a chat is calling the chat will, however, be transferred back to queue.
In case routing to End route  is used, the customer will, at an overload, get a message to return later.